Plexstack Part 5 – Installing Radarr

There are a couple more concepts I want to cover before turning folks loose on a github repo:

  1. Instead of a hostpath, we should be using a PVC (persistent volume claim) and PV (persistent volume).
  2. What if we need to give a pod access to an existing and external dataset?

Radarr (https://radarr.video/) is a program that manages movies. It can request them using a download client, and can then rename and move them into a shared movies folder. As such, our pod will need to have access to 2 shared locations:

  1. A shared downloads folder.
  2. A shared movies folder.

NFS Configuration

We need to connect to our media repository. This could directly mount the media server, or to a central NAS. In any case, our best bet is to use NFS. I won’t cover setting up the NFS server here (ping me in the comments if you get stuck), but I will mention how to connect to an NFS host.

This bit of code needs to be run from kubernetes node if you happen to use kubectl on a management box. If you have been following these tutorials and using a single linux server, then feel free to ignore this paragraph.

shell
/etc/fstab

Lines 29 and 30 were added to the end of the file. Be sure to change the IP address and export path. Go ahead and mount the exports:

Shell

PVC and Radarr configuration

Second, we don’t want to use host path under most circumstances, so we need to get in the habit of using a PVC with a provisioner to manage volumes. This will effectively make our architecture much more portable in the future.

A CSI driver allows automated provisioning of storage. Storage is often external to the kubernetes nodes, and is essential when we have a multi-node cluster. I would encourage everyone to read this article from RedHat. The provisioner we will be using is rather simple: it would create a path on the host and store files there. The outcome is the same, but the difference is how we get there. Go ahead and install the local provisioner:

Shell

Now take a look at this manifest for rancher (as always, a copy of this manifest is out on github: https://github.com/ccrow42/plexstack):

YAML

Go through the above. At a minimum, lines 80 and 83 should be modified. You will also notice that our movies and download directories are under the /mnt folder.

To connect to the service in one of two ways:

  1. LoadBalancer: run ‘kubectl get svc’ and record the IP address of the radarr-service, then connect with: http://<IPAddress>:7878
  2. Connect to the host name (provided you have a DNS entry that points to the k8s node)

That’s it!
PlexStack Part 1.6 – Installing Plex

Due to the last post getting a bit length, I’m going to cover installing Plex in a separate post. However you get a Linux VM, you can simply log in to the box.

This is probably the worst time to tell people, but you can easily run Plex on Windows, but that would not allow you to run Plex on a Raspberry PI.

Log in to your VM.

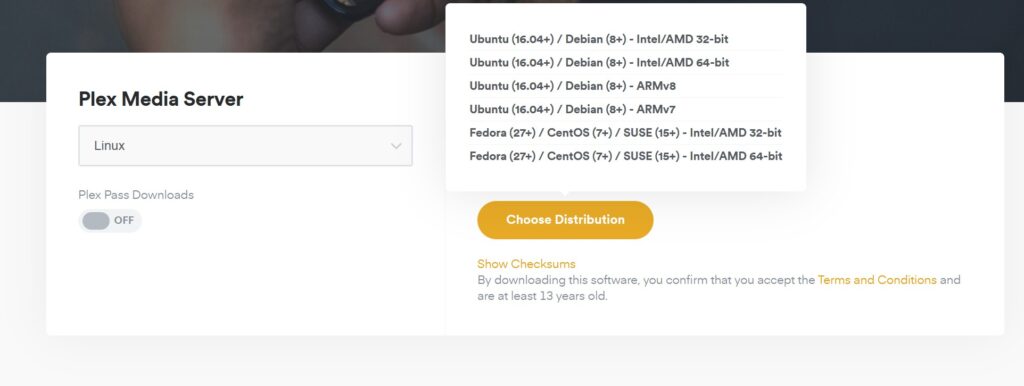
Next, we need to get the plex installation. Head over to plex.tv and select linux, and click the “Choose Distribution” option.

We are now going to do something tricky: Right-click on the Ubuntu Intel/AMD 64-bit or the Ubuntu ARMv8 (if you use Raspberry PI) and select “Copy Link”. After all, we want the software on our linux box!

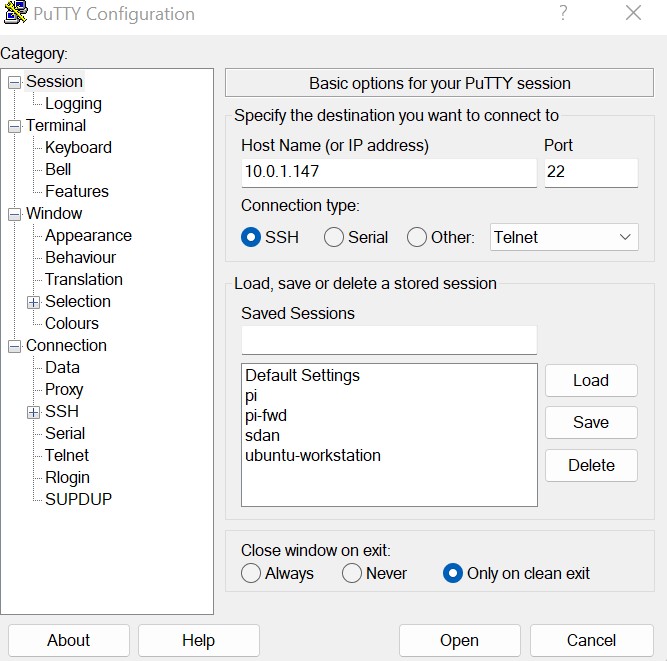
If you haven’t already, get an application called putty. This will allow you to connect to a terminal of your new Linux server, and paste commands most importantly! Launch the app:

Plug in that IP that you wrote down

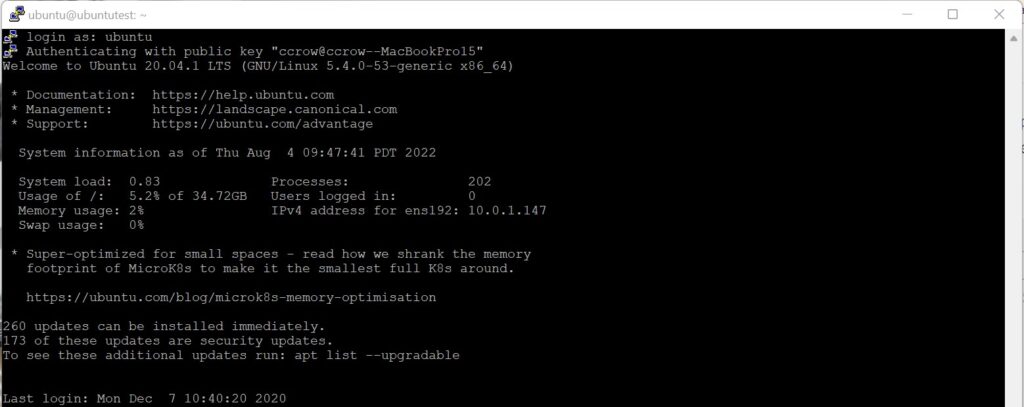
And then type in your username and password at the prompt.

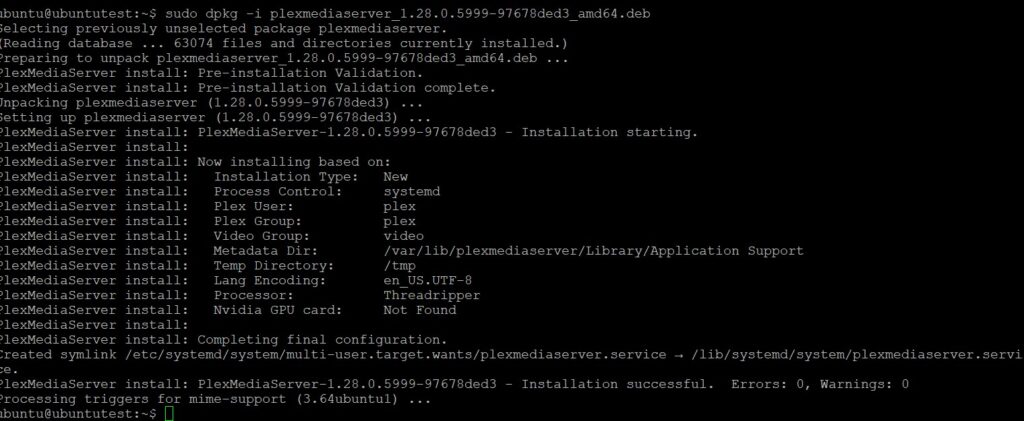
At the prompt, let’s download and install Plex:

Shell

Keep in mind that the first time you run a command with sudo (which allows you to become an administrator for just that command) you will have to type your same password in again.

You are set! Plex is done! Access it with: HTTP://<YOURIPADDRESS>:32400/web

Getting media over is a separate task. It can be as simple as getting a drive from Costco. Consider formatting the drive on the Linux machine and transferring data using a tool like WinSCP.

Drop a comment if you get this far and I can update the post.

PlexStack Part 1.5 – Installing Ubuntu and Plex Media Server

An earlier post sparked enough questions from folks that I figured I would write a separate article: If I just want a Plex server, how would I go about installing that?

So far, my posts have assumed that my readers have a degree of skill using Linux, and that they were able to install a Linux server fairly easily. Not everyone falls in to the above category, so I figured I would write a quick post to hopefully point people in the right direction.

What do I need to set up a linux server?

The short answer is: a place to install a linux server. This could be any of the following:
– A Raspberry PI
– Running as a virtual machine on your desktop (you should have a bit of ram for this!)
– An old computer or laptop you have lying around

I will cover each of these to hopefully provide some resources

A Raspberry PI

Getting Linux installed on a Raspberry PI is probably the simplest out of all the above options. You will of course need a Raspberry PI as well as a Power Supply and SD card (look for a bundle in the store if it is your first time doing this). You will also need a way to put Linux on the SD card for the Raspberry PI to boot, consider something like this

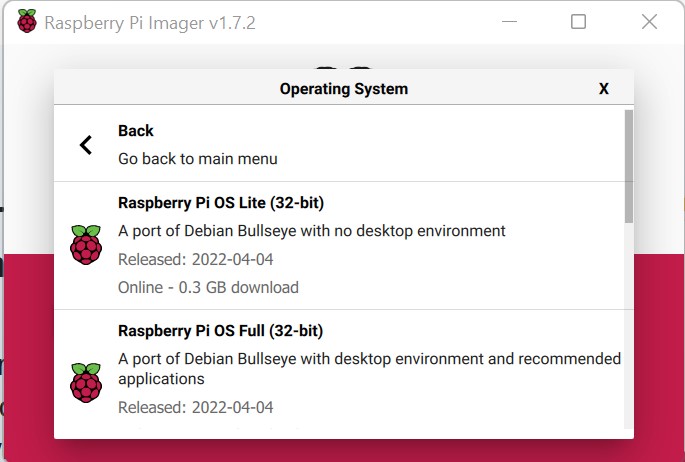
Once you have the parts, plug the SD card in to the USB adapter. Download the following program: https://www.raspberrypi.com/software/. This program will download and install Raspberry PI OS to the SD card. Launch the application, and select “Choose OS”. I would select “Raspberry PI OS (other)” and then “Raspberry PI OS Light” so we don’t install a desktop. You can install a desktop later if you would like, but getting comfortable with the CLI on Linux is essential.

Next, select the SD card device and click “Write”. You can then plug in the SD card and power on the Raspberry PI.

Running on a Virtual Machine

Because I run ESXi and VMware workstation at home, I’m going to have the least info on how to do this, but I would recommend installing VirtualBox on your PC. This will allow you to create a virtual machine:

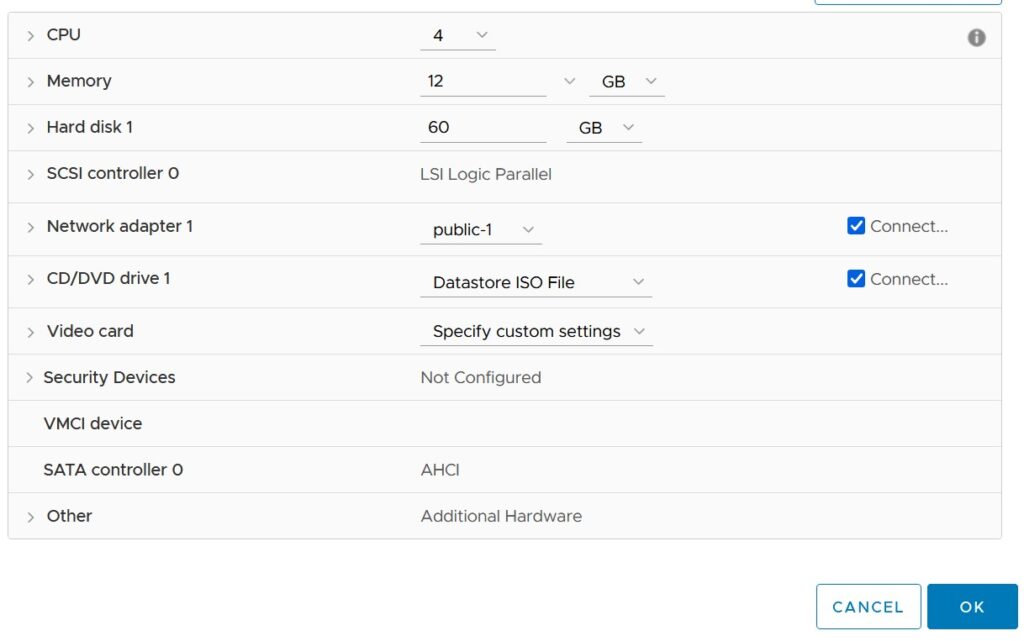
The above is an example of a virtual “hardware” configuration

However you arrive at it, you can see that we connect a “virtual” CD/DVD drive. You can get the .ISO file here: https://ubuntu.com/download/server.

You will also need to ensure that your network type is set to “bridge” so that other computers can access the VM (and therefor, your plex server)

Install on an old desktop or laptop

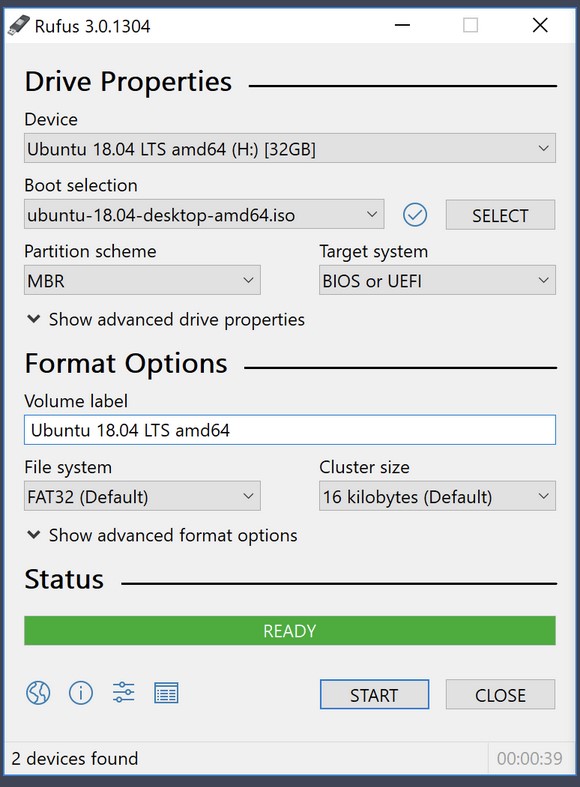
In order to install Linux on an old computer, we will need to boot from some installation media. Grab an old USB drive and download Rufus and Ubuntu.

Rufus is a tool that writes an ISO to a USB drive so you can boot your computer from the USB drive to install Linux. Keep in mind that installing Linux is DESTRUCTIVE to your old computer. Fire up Rufus and point it to your ISO file and your USB drive.

Insert the USB drive and reboot your computer (keep in mind that you may need to tell your computer to boot from the USB drive, this can usually be done by pressing F11 or F12 when the computer first powers on, but it depends on the computer).

Install Linux (Finally)

We can now run through the Linux install (unless you choose to use a raspberry PI, then skip this section).

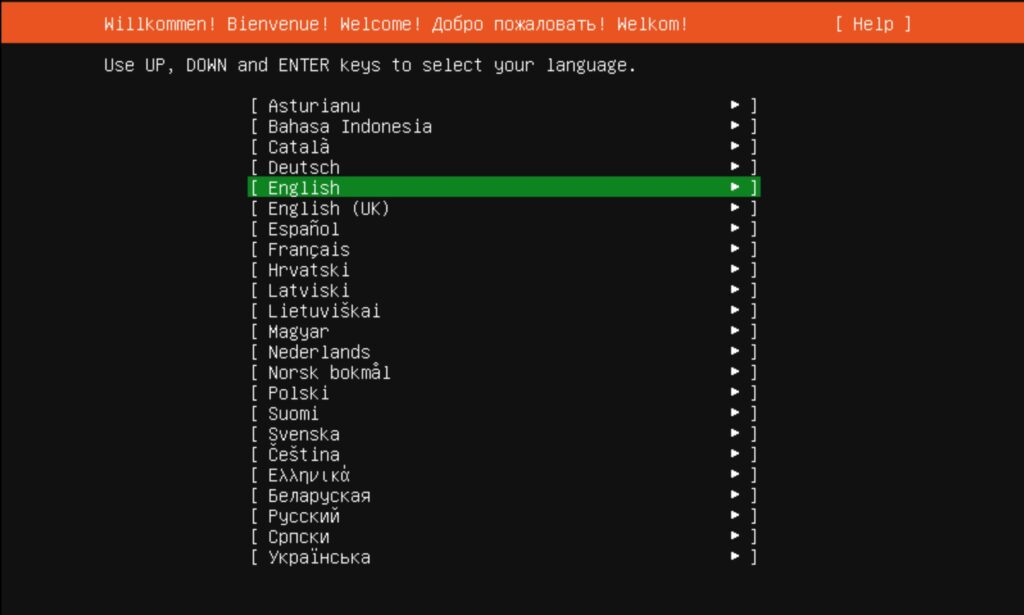
Pick your language
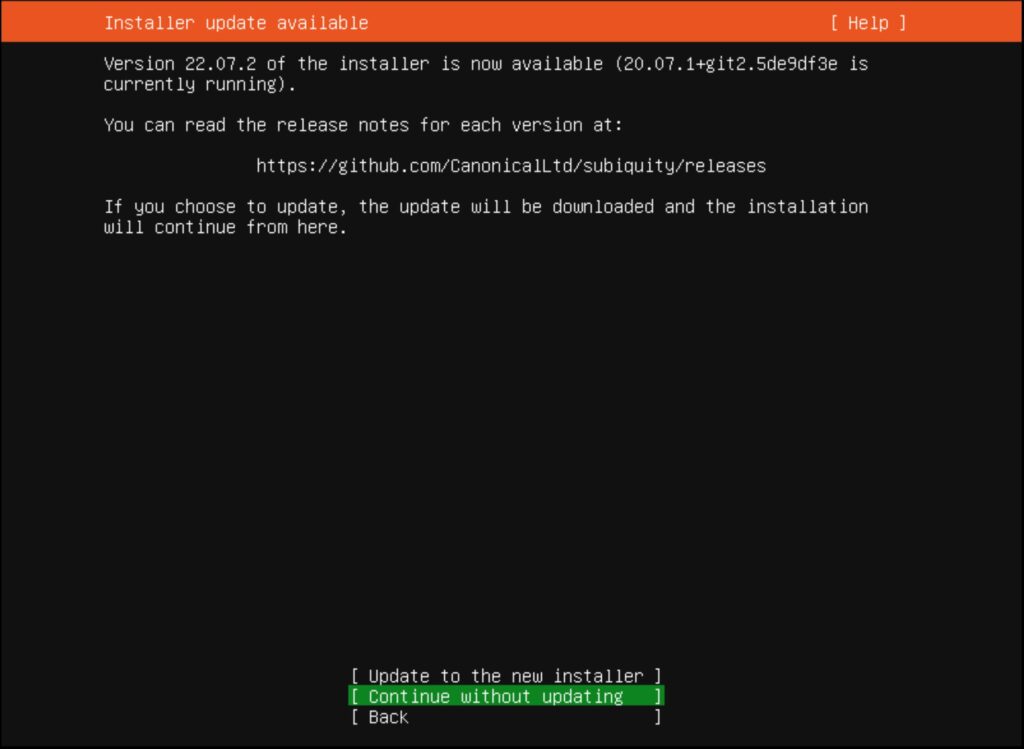
Don’t bother updating the installer
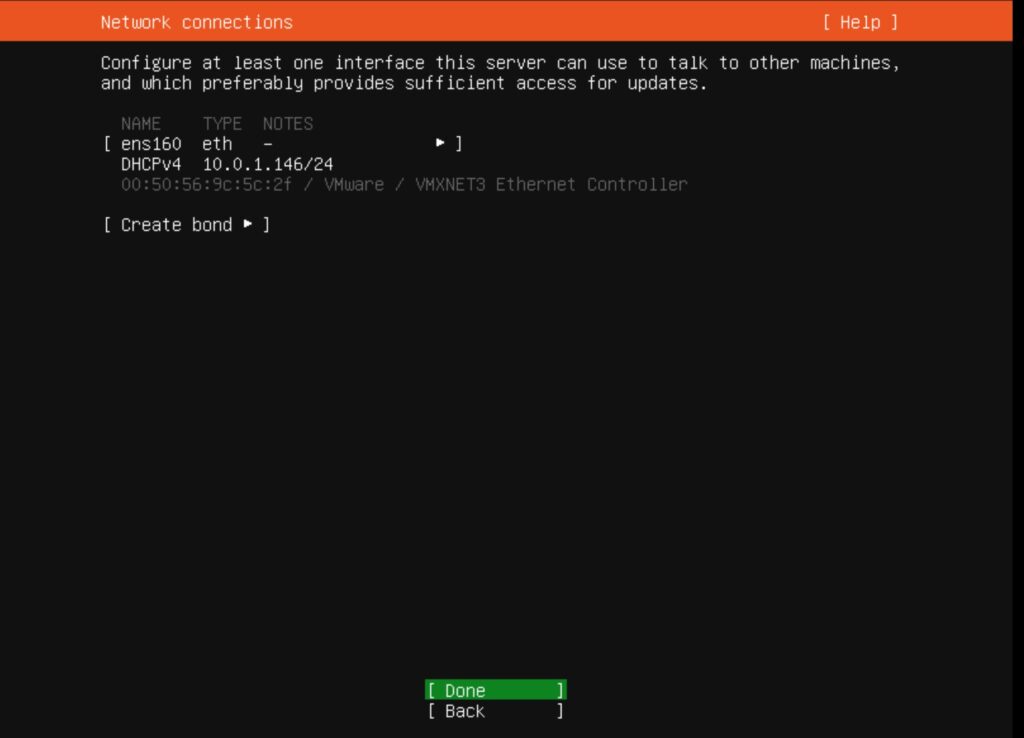
Write down this IP address! This is how you will get to your Plex server and SSH
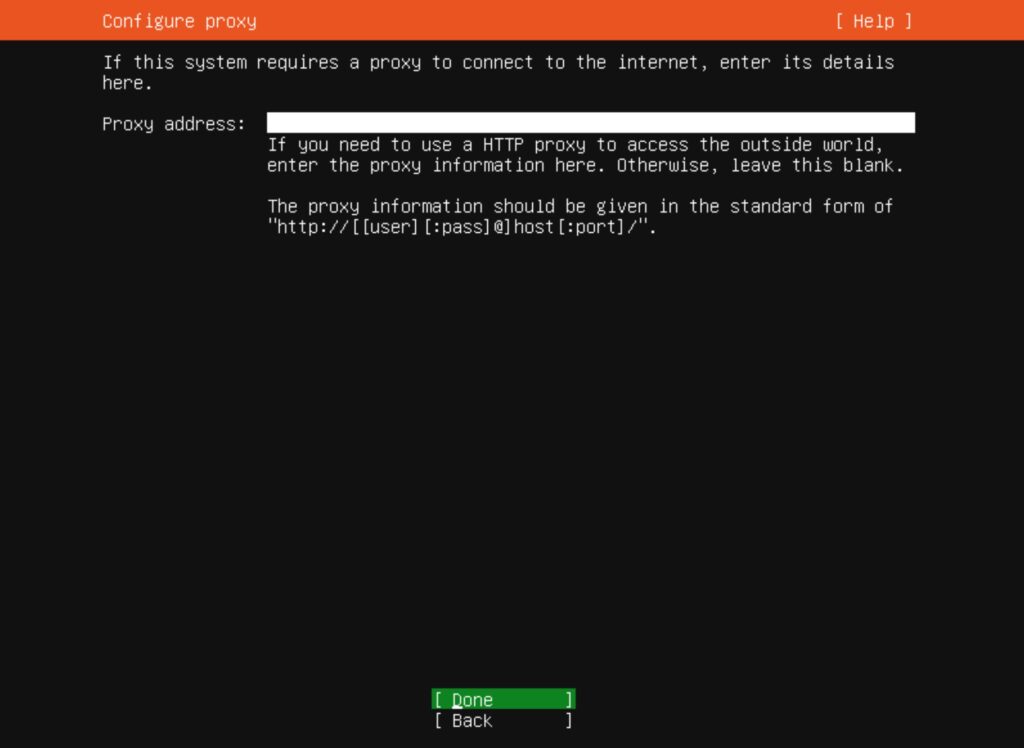
If you don’t know if you are running a proxy, you aren’t
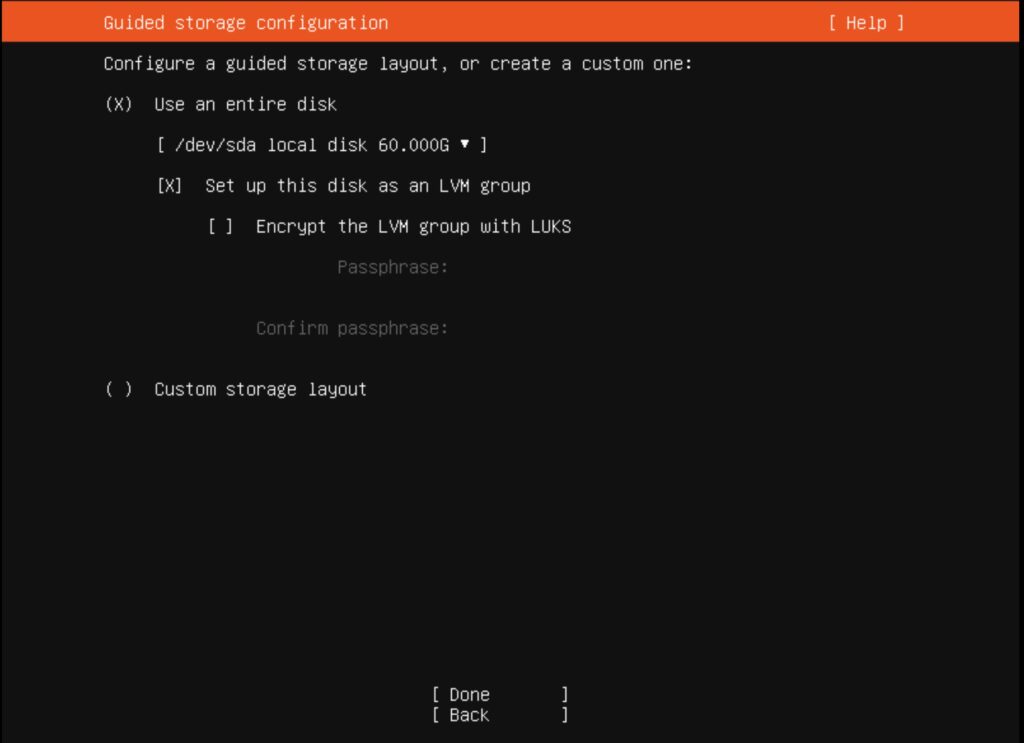
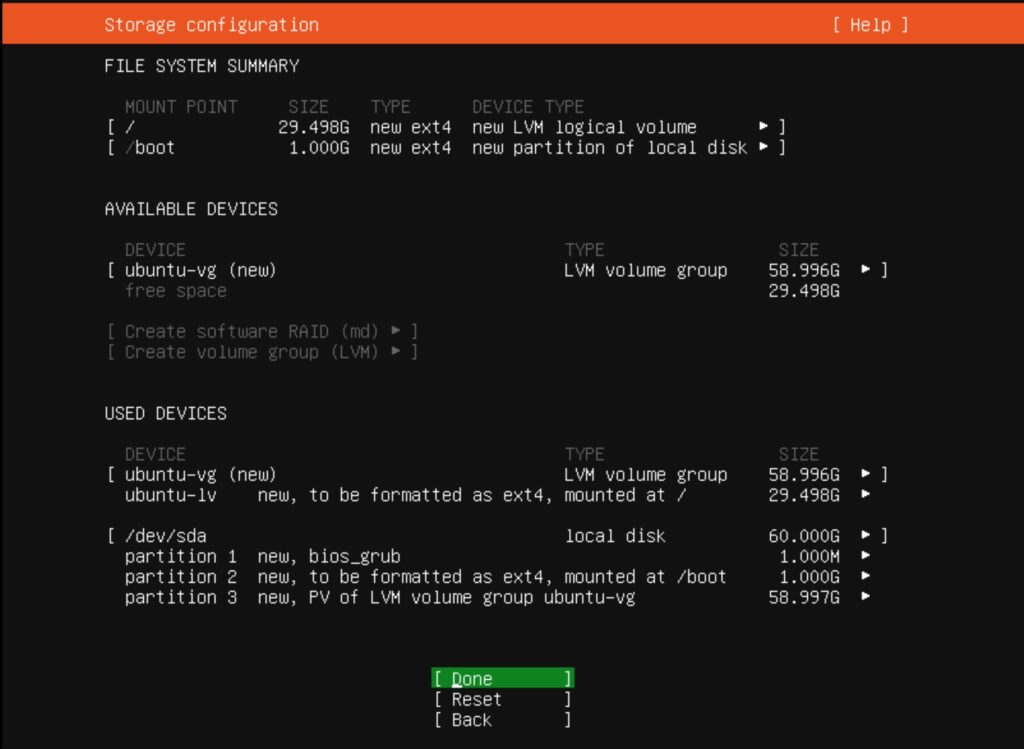
Use the defaults here
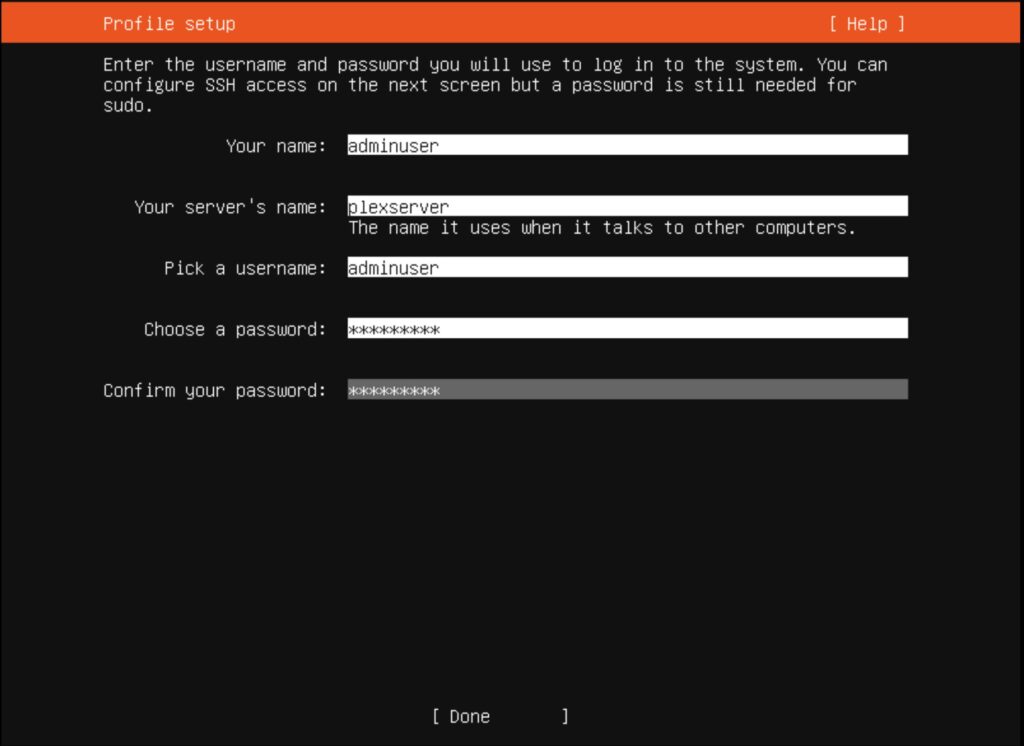
Set a computer name, username, and password. Be sure to document it!
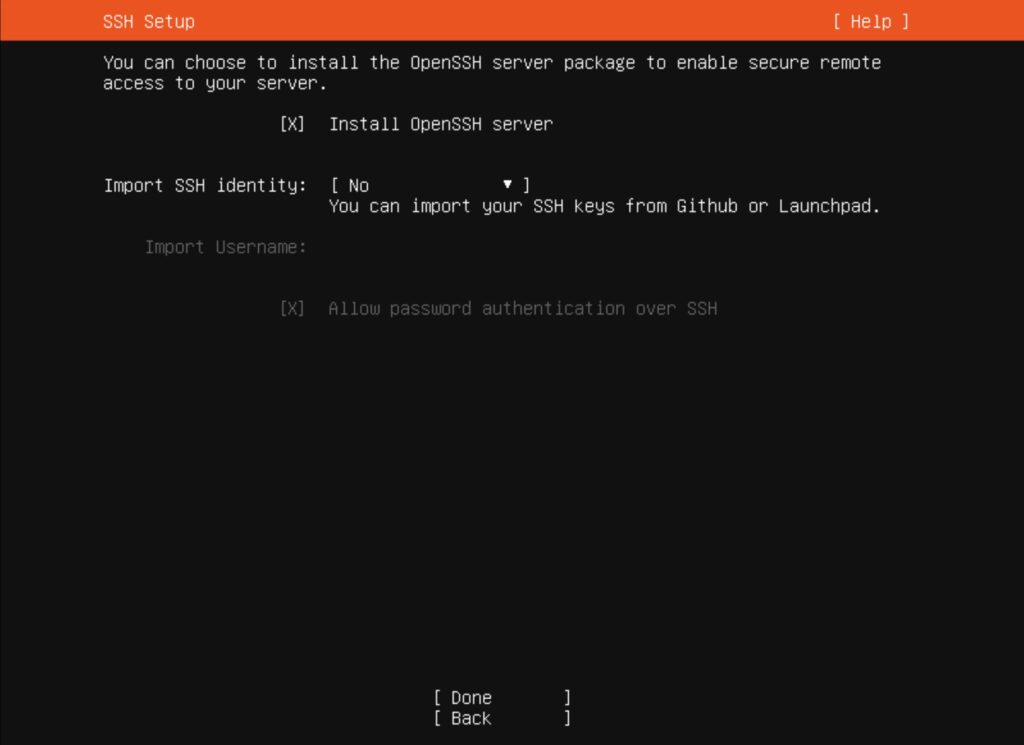
Check the box to install the SSH server

That is it, the server will reboot and you should be able to log in using a keyboard and mouse.

This post is getting long, so I’m going to save the plex install for the next post.

PlexStack Part 4 – Our first app: Tautulli

We are now at a point where we can build our first application that requires some persistence. We are going to start with Tautulli, an application that provides statistics about your Plex server.

We assume that you only have a single server. The state of kubernetes storage is interesting. The easiest way is to simply pass a host path in to the pod, but that doesn’t work when you have multiple nodes. Incidentally, what I do for my day job (Portworx Cloud Architect) is solving these problems for customers. More on that later.

We first need to specify a location to store configuration data. I will use /opt/plexstack/tautulli as an example.

Shell

Next, let’s take a look at the manifest to install tautulli:

tautulli.yaml

There is a lot to unpack here:

  • The first section is the deployment. It defines the application that will run. Line 19 specifies the image.
  • Lines 21 – 26 are environment variables that configure tautulli
  • We can see where we specify the /config directory inside the container to be mapped to a host path (lines 29 – 35).
  • The next section is the service, which looks for pods with an app selector of tautulli.
  • We are also going to provision a load balancer IP address to help with troubleshooting. This could be changed to ClusterIP to be internal only. After all, why go to an ip address when we can use an ingress.
  • Tautulli.ccrow.org must resolve to our rancher node through the firewall (a step we already did in the last blog.

Let’s apply the manifest with:

Shell

Notice the external IP address that was created for the tautulli-service. You can connect to the app from that IP (be sure to add the 8181 port!) instead of the DNS name.

All configuration data will be stored under /opt/plexstack/tautulli on your node.

Bonus Appplication: smtp

In order for tautulli to send email, we need to set up an SMTP server. This will really show off the power of kubernetes configurations. Take a look at this manifest:

smtp.yaml

You can apply the above manifest. Be sure to change lines 24 and 26 to match your network. Please note: “Your network” really means your internal kubernetes network. After all, why would we send an email from an external source (well, unless you want to, in which case, change line 41 to loadBalancer).

Shell

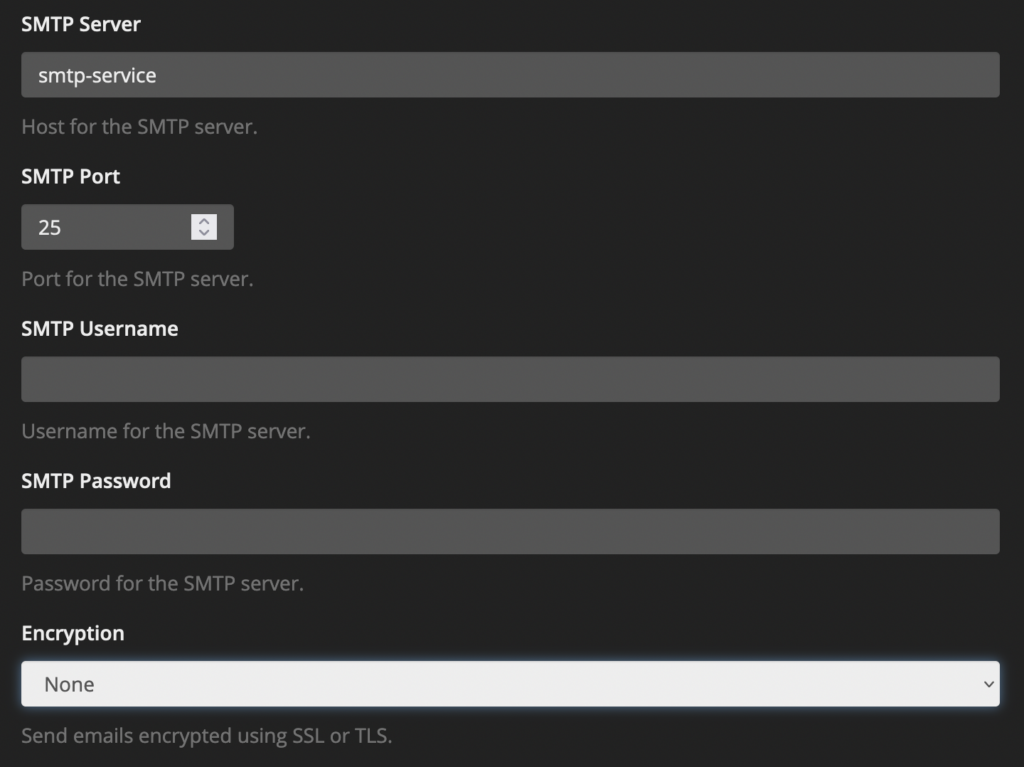
We now have a working SMTP server! The coolest part of kubernetes service discovery is being able to simply use the name of our service for any application in the same namespace:

Using the service name means that this configuration is portable, no need to actually plug in the cluster IP address that was assigned.

PlexStack Part 3 – External Services and Ingresses

Now we will finally start to get in to some useful configurations for our home PlexStack: Ingresses and external services.

An Ingress is a kubernetes managed reverse proxy that is typically selected through a host. It turns out that your new Rancher cluster is listening on port 80 and 443, but if you have tried to connect by IP address, you will be greeted with a 404 error. An ingress will essentially route a web connection to a particular URL to a service. This means that you will need to configure your DNS service, and likely your router. Let’s look at an example to explain:

I have a service called Uptime Kuma (an excellent status dashboard with alerting) that runs on a raspberry PI. The trouble is, I want to secure the connection with SSL. Now I could install a cert on the Pi, but how would I automatically renew the 90 day cert for let’s encrypt? More importantly, how do I have multiple named services behind a single IP address? Ingresses.

For my example, I have a DNS entry for status.ccrow.org that points to the external IP of my router. I then forward ports 80 and 443 (TCP) to my Rancher node. If I have more than one node, it turns out I can port forward to ANY rancher node.

Next, I have a yaml file that defines 3 things:

  1. A service – an internal construct that kubernetes uses to connect to pods and other things
  2. An endpoint – a kubernetes object that resolves to an external web service
  3. An ingress – A rule that looks for incoming connections to status.ccrow.org, and routes it to the service, and then endpoint. It also contains configurations for the SSL cert information
uptimekuma-external.yaml

A few important elements in the above I will explain:

  • all 3 of these elements will be stored in the externalsvc namespace (which will need to be created!)
  • The ingress >(points to)> the services >(points to)> the endpoint
  • The name of the service and endpoint needs to match on line 5, 17, and 46
  • The service type on line 7 is interesting. If it is set to loadBalancer, then an IP address (from the range that we defined in the previous blog post) would be provisioned to the service. No sense in doing that here.
  • Line 30 defines which cert provisioner we are using. Per our previous blog post, your choices are letsencrypt-prod, letsencrypt-staging, and selfsigned-cluster-issuer. Only use letsencrypt-prod if you are ready to go live. You can certainly use a self-signed issuer if you are using an internal DNS name, or if you don’t mind a self-signed certificate.
  • Lines 36 and 39 must match, and define the dns name that will be the incoming point.

Apply the config with:

Shell

If you decided to go with the let’s encrypt cert, some verification has to happen. It turns out, the cert-manager will create a certificate request, which will create an order, which will create a challenge, which will spawn a new pod with a key that the let’s encrypt services will try to connect to. Of course if the DNS name or firewall hasn’t been configured, this process will fail.

This troubleshooting example is an excellent reference for tracking down issues (Credit):

Shell

9/10 times, the issue will be in the challenge, and let’s encrypt can’t connect to the pod to verify you are who you say you are.

Now the above isn’t very cool if you only have one service behind your firewall, but if you have half a dozen, it can be very useful because you can have all of your web services behind a single IP. We will be building on using the ingress next by deploying our first application to our cluster..

PlexStack Part 2 – Installing Metallb and Cert-Manager on your new node.

Well, after a lengthy break involving a trip to Scotland, we are back in business! I also learned that I don’t remember as much about VMware troubleshooting as I used to when I encountered a failed vCenter server, but that is a story for another time.

In this post we will be installing a couple bits of supporting software. Metallb is a load balancer which will allow us to give out a block of IP addresses to K8S services, which can be a fairly easy way to interact with kubernetes services. Cert-manager is a bit of software that will allow us to create SSL certificates through let’s encrypt.

MetalLB

There are a couple of things that are worth getting familiar with. First, be comfortable with a text editor. I will be posted a number of files that you will need to copy and modify. Second, I would learn a little about git. I have a repository that you can feel free to clone here.

To install Metallb, we will first install the manifest.

Shell

Note the static URL above, it may be worth heading over to https://metallb.universe.tf/installation/ for updated instructions.

Next, we need to configure MetalLB by editing the following file:

metallb-config.yaml

Edit the above and change the addresses. The binding is handled by the L2Advertisement. Because the is not a selector that calls out first-pool, all of them are used. Obviously, your addresses should be in the same subnet as your K8s nodes. You can apply the config with:

Shell

That’s it, on to cert-manager.

Cert-Manager

the cert manager installation is best done with helm. Helm similar to a package manager for kubernetes. Installation is rather straight forward on Ubuntu. Of course snap seems to be a rather hated tool, but it does make things easy:

Shell

And the installation of cert-manager can be done with:

Shell

That’s it! Now we just need to configure it. Configurations will be handled with certificate issuers, which simply tell cert-manager how to generate a certificates. Don’t worry about the specific network plumbing just yet (we will cover that in the next post). I use 3 issuers: prod (let’s encrypt), staging, and self-signed. Take a look at the following and edit as needed:

cert-issuer.yaml

The emails above should be changed. It is also worth noting that I have combined 3 different manifests by separating them with ‘—‘ . You can apply the config with:

Shell

That will do it! We are ready to move on to configuring our first service.

PlexStack Part 1 – Installing a single node Kubernetes Cluster

In our last post, I provided an overview of what we are trying to accomplish, so we will dive right into creating a single node Kubernetes cluster.

We are going to use Rancher RKE2 running on Ubuntu 20.04. I will admit that a lot of these choices are due to familiarity. There are a few other options for advanced users.

  • For a multi-node Rancher RKE2 cluster, check out A Return of Sorts
  • For a slightly more manual way, consider using kubeadm (I really liked this post)

We will need to start with a serviceable Ubuntu 20.04 machine. You can really install this on your hypervisor of choice. I would recommend giving your VM 4vCPUs, 12gb of RAM, and a 60GB root drive. Head over to ubuntu.com and grab a manual install of 20.04. The installation is fairly easy, enable SSH and give your VM a static IP address. (And comment if you get stuck and I will set up a tutorial).

Advanced Tip: For those that want to build a ubuntu 20.04 template using VMware customizations, check out this post at oxcrag.net

We should now have a running Ubuntu 20.04 VM that we can SSH to. I will be installing all of the client tools and configurations on this same VM.

Let’s update our VM and install some client tools:

Shell

Installing RKE2

Up until now, I have been a little loose with the terms Rancher and RKE2. Rancher is a management platform that can install on any Kubernetes flavor and acts as a bit of a manager of managers. RKE2 is the Rancher Kubernetes Engine 2, which is a lightweight Kubernetes distro that is easy to install and work with.

Install RKE2 with:

Shell

Now let’s install and configure some client tools.

Shell

That’s it! We have a single node Kubernetes cluster!

Introducing PlexStack

After a hiatus due to my own stupidity of not adding this website to my backup set (which is somehow the greater sin than me destroying my Kubernetes cluster in a rage without bothering to check on said backup), I’m going to start documenting PlexStack.

PlexStack is a collection of configurations to bring a single node Kubernetes cluster online to do a few things that can start to be difficult if we were to set them up separately:

  • An ingress that can provide access to different internal web pages from a single IP address.
  • SSL certificate management using Let’s Encrypt and endpoint termination at ingress
  • A place to easily run some applications to support your plex infrastructure:
    • Monitoring with Uptime Kuma
    • SMTP relays
    • Apps like Radarr, Sonarr, OMBI, etc

The goal is with a little Linux, and networking knowledge, you will be able to provide external resources to the world that are encrypted, as well as having an easy-to-maintain, secure place to run many of the applications we all use to automate plex infrastructure.

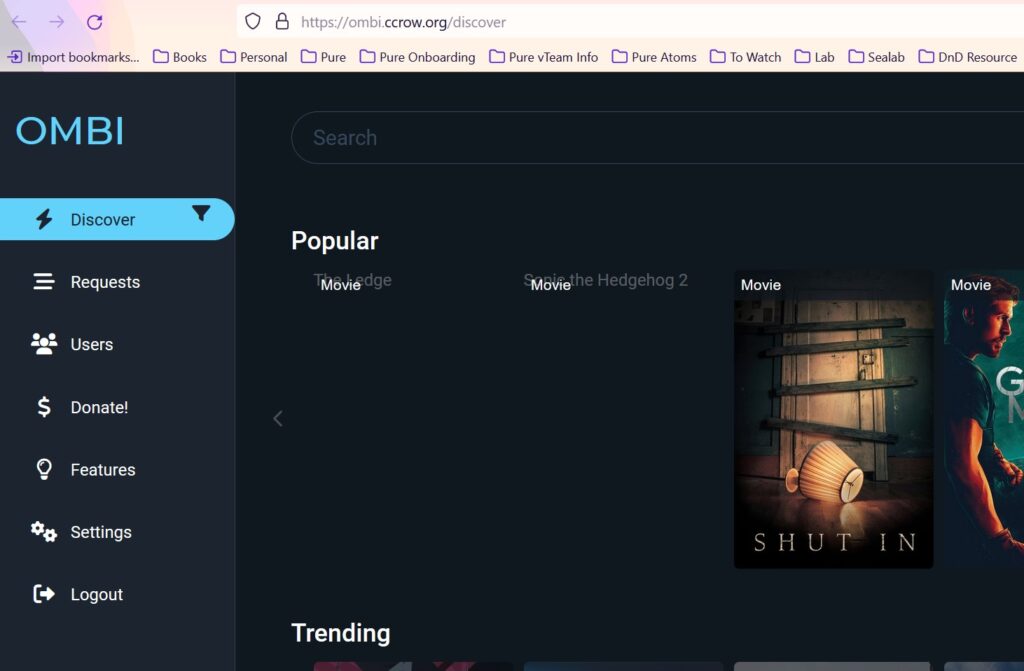
OMBI running in a container with a proper SSL cert

The full list of applications that we will be spinning up:

  • OMBI
  • Radarr
  • Sonarr
  • qBittorrent
  • Tautulli
  • SMTP relay
  • Uptime-Kuma
  • Varken
  • Jackett

What do we need to get started?

We will need a single Ubuntu 20.04 server with:
– 4 to 6 cores
– 16gb of RAM
– 80gb root drive
– A static IP address
– (optional) a block of IP addresses for those that would like to deploy a load balancer.

It is outside of the scope of this series to build and deploy a ubuntu template, but if you wish to use VMware for deployment, I would recommend this excellent blog post. Otherwise, just install the server by hand. I would also get used to SSHing into the box (and consider setting up a key.